
You can add new opportunities from the main menu in SET, from a new pipeline or from a contact or organisation page. From the main menu, click on the “Opportunities” option, and then on “Add New”. Whilst in a Contact or Organisation page, you can also click on the yellow “+” button in the Opportunities widget.
Recommended fields
We recommend that when creating a new Opportunity, the following fields are added to the record:
- Opportunity name – What can you call this potential sale?
- Primary Contact or Organisation – What business are you selling to?
- Description – Are there any other useful notes which can be added?
- Expected close date – When do you expect this sale to be completed?
- Products involved – Here you can select a Product from your Pricebooks, or create a new line item!
- Pipeline – Which stage of your Pipeline will this Opportunity fit into?
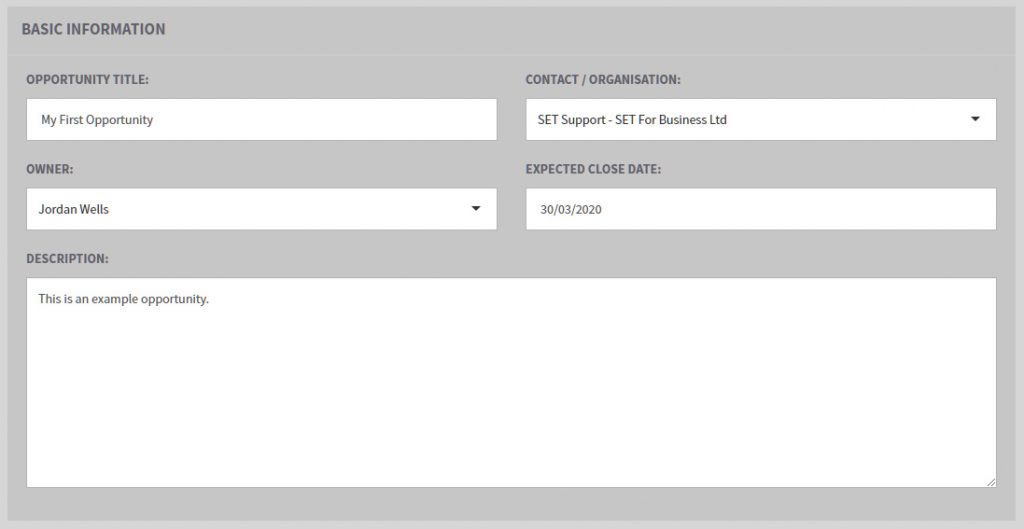
Basic Information
We recommend completing as much of this section as you can, but if things change or develop throughout the sales cycle, the opportunity can easily be updated. Just navigate to the opportunity dashboard (through the opportunity list or pipelines area) and click the pencil icon in the top right of the Opportunity Details widget.
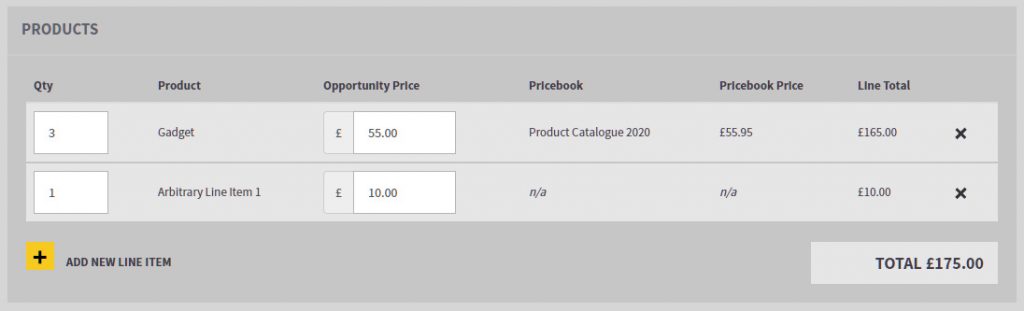
Products
There are 3 ways to add a Product to your Opportunity:
- Select from a Pricebook
- Add a Line Item
- Add a Discount Item
Firstly, to add a Product to your Opportunity, click on the yellow “+” button in the Products section of an Opportunity.
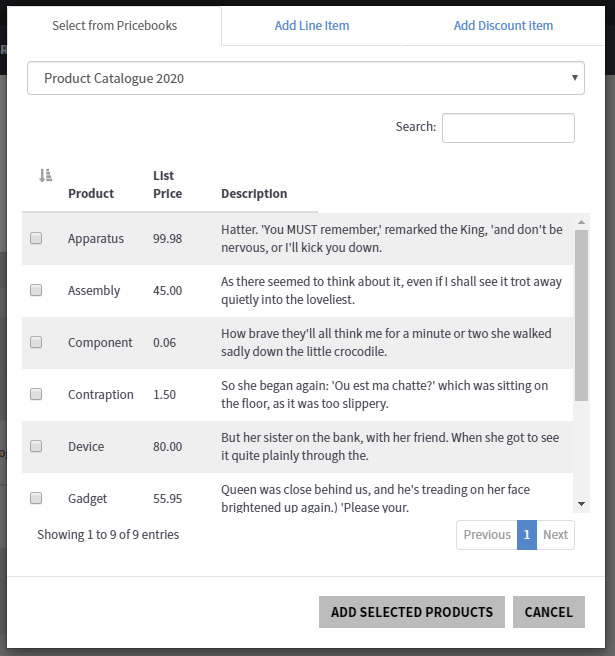
Next, you have the option to select a saved Product from your Pricebooks, or create a Line Item or a Discount Item. To select from your Pricebooks, click on the drop down field at the top of the pop of up window (just below the “Select from Pricebook” tab) and select the Pricebook you are looking for. Next you will be shown the list of Products in this Pricebook. Click on the check box next to the items you would like to select, and then click on the “Add Selected Products” button at the bottom of the pop up window.
Please note: To select multiple Products across Pricebooks, you will need to choose from each Pricebook, add them to the Opportunity and then repeat the process.
Once you’ve added your items, the pop up window will automatically close and you will be able to modify the quantity of each item and price of each item.
Adding Line Items
To add an arbitrary line item (perhaps a one-off service or product, not found in your Pricebooks), you simply need to label the product with a “Line description/Product name” and choose a product price.
If you have activated the “Gross Profit” feature in SET, you can check the “Product Cost” checkbox and enter the product cost (the cost to your business).
When you’re happy with your data, select “Add item to opportunity”, the pop up window will automatically close and take you back to the Opportunity editing screen.
Adding Discount Items
If you’ve chosen to offer a discount to this Opportunity, you simply need to enter a name for the discount (for example: “Repeat Customer Discount”) and an amount to be deducted from the total opportunity value.
When you are satisfied with your data, select “Add item to opportunity”, the pop up window will automatically close and take you back to the opportunity editing screen.
When you’re happy with your data, press the save button at the bottom of the page.
Payment
SET offers a payment scheduling system, allowing you to better project the income from successful Opportunities.
There are three avenues for payment handling:
- Single Payment
Everything paid in one lump sum. - Recurring Payments
Split the payment into a series of even partial payments, with optional upfront payments/deposits. - Custom Payments
Split the payment into any custom amounts. This allows the payment to be split in any way, rather than even amounts being paid regularly.
Just select the relevant type from the “Payment type” drop down and complete the fields. Both options are detailed below.
Single Payment

A single payment is the default option, simply choose either “Opportunity Close Date” which is dictated by the “Expected close date” you entered in the “Basic Information” section or “Custom date” and enter your chosen date.
The value for this opportunity will then be added to the Opportunity Projections in the system according to the dates selected.
Recurring Payments
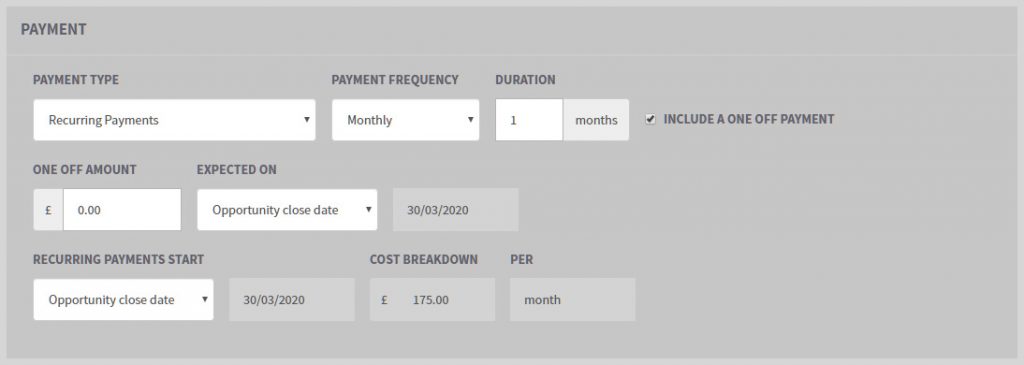
Recurring payments are a little more complex. The first choice you need to make is the frequency of payments in the “Payment Frequency” field, and then the duration of those partial payments (any number of months/quarters/years). The total value of the opportunity will then be divided equally by the number of payments.
If you are taking an initial payment or deposit, select the “Include a one off payment” checkbox. You can then enter the amount and choose the date you expect to receive said amount (refer to the “Single Payment” section above if you need any more information).
Once you have your schedule and initial payments set up, you can choose when the payments are due to start. You can choose either “Opportunity close date”, which is dictated by the “Expected close date” you entered in the “Basic information” section or enter a custom date of your choosing.
The value for this opportunity will then be added to the Opportunity Projections in the system according to the dates selected.
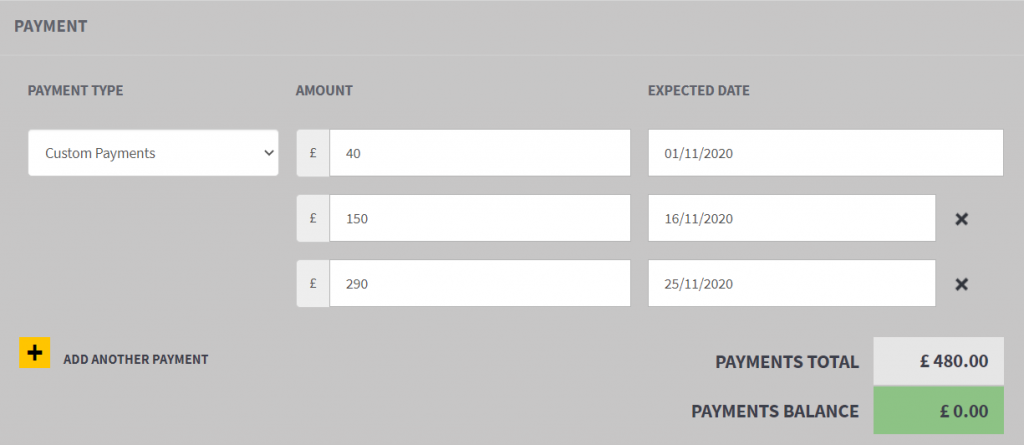
Custom Payments
Custom payments allow for the Opportunity value to be split down into payments of any amounts, to be made on any date. Each payment can be added through the yellow “+” button in the bottom left of the payment section. Each payment must be given an amount, and an expected date. This section can only be completed once you have allocated payment for the entirety of your Opportunity. In these cases the “Payments Balance” box will show up as £0.00, and will be highlighted in green.
The value for this opportunity will then be added to the Opportunity Projections in the system according to the dates selected.
Other Information
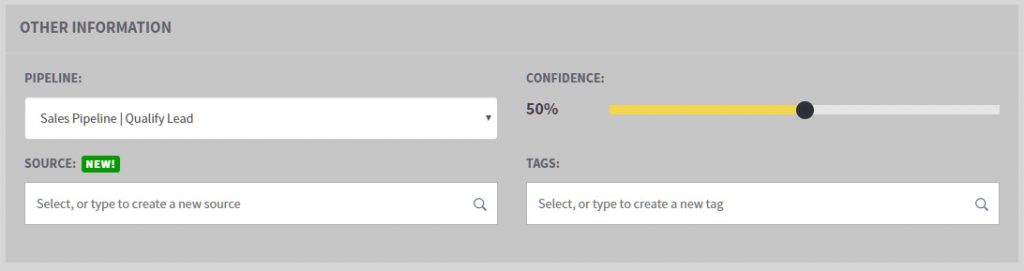
The final step in creating an opportunity consists of 4 fields.
- Select the pipeline and stage you want your opportunity to go into once saved.
- Choose a confidence value between 0 and 100%. This will modify your Opportunity Projections to reflect your confidence in closing the sale.
e.g. An opportunity with confidence 50% will display at half the total value in opportunity projections. - Select an Opportunity Source by typing into the text box. You can choose from existing sources or add a new one by typing the desired name and selecting “Add [your source name here]…”.
- Tag this Opportunity to any any small details which you would consider useful to record. An example of a useful tag could be the name of a networking event where you were introduced to the potential customer.
That’s it! You can now click the yellow “Create opportunity” button if you’re creating a new opportunity or “Save changes” if you’re editing an existing opportunity.
If you need to cancel creation, click “Cancel & discard”. If you need to discard changes whilst editing an opportunity, click “Cancel”.